Docker Overview
Views: 4155
For an updated article, see Docker Container Introduction.
This article is for all those who are confused by the Docker concepts and who would like to have a short summary of the important things, instead of a widely distributed documentation.
Most Important Commands
Optional parts in [brackets]. For more commands, see docker help or docker help command.
- Search Image with
keywordon Registry docker search [host[:port]/]keyword- Download Image from Registry
docker pull [host[:port]/][user-name/]image-name[:tag]- List all Local Images
docker images- List all Running Container
docker ps- List all Container
docker ps -a- Remove a Local Image
docker rmi image-name- Remove a Container
docker rm container-name- Stop a Running Container
docker stop container-namedocker pause container-name- Start a Stopped Container
docker start container-name- Open a Shell in a Running Container
docker exec -it container-name /bin/bash- Create a New (or Update) Image From Container
docker commit container-name [host[:port]/][user-name/]image-name[:tag]- Store New or Updated Image on Registry
docker push [host[:port]/][user-name/]image-name[:tag]- Remove an image from the own registry
curl -u 'username:password' -XDELETE- Create a New Image from an Existing Directory (e.g. created with
bootstrap) tar c . | docker import - [host[:port]/][user-name/]image-name[:tag]
Registry vs. Image vs. Container
Docker is based on an image registry, which is a virtual machine template image repository. It behaves similar to a git repository. You can have your own local registry on your own host (i.e. if your images contain secrets). An image is a template for a virtual machine instance. A container is a virtual machine and can be running or stopped. Starting an image with docker run always creates a new container, so don’t run twice, run once, then start and stop the container. A container can be seen as a persistent process.
Install Docker
On Ubuntu 16.04, package docker.io installs docker version 1.12, which is the first that supports docker swam, but still misses new features, such as docker config and docker secret. That’s why you better install from docker.com:
wget -qO- https://download.docker.com/linux/ubuntu/gpg | sudo apt-key add -sudo add-apt-repository"deb [arch=amd64] https://download.docker.com/linux/ubuntu $(lsb_release -cs) stable" sudo apt-get update sudo apt-get install docker-ce lxc-docker- docker-engine- docker.io-
To be able to run docker as non root user, add your username to group docker, then logout and login again, or simply run su - $(whoami) or ssh localhost, to get the new group (e.g. on Ubuntu):
sudo adduser $(whoami) docker
or (e.g. on OpenSUSE):
sudo usermod -aG docker $(whoami)
Search an Image on a Registry
Use docker search searchtext to find an image for «searchtext» in the public docker repository, or to search an apache image on your repository, e.g. on localhost port 5000, use docker search localhost:5000/apache.
Since I have an apache image in my repository on server dev0004, I receive:
> docker search dev0004:5000/apache
NAME                    DESCRIPTION   STARS     OFFICIAL   AUTOMATED
library/ubuntu-apache                 0
Pull an Image from a Registry
Before you can instanciate a container from an image, you need to pull it from the repository. E.g. pull the apache image from above:
docker pull dev0004:5000/library/ubuntu-apache
Run a Container from an Image
A docker image is an image template. To really instantiate a virtual machine from an image, use docker run. For all the parameters and settings, you need the image builders documentation. You should at least specify a name with --name, so that you can access the container by a well knoen name. Otherwise a name is generated. To make sure, the container keeps running and is restarted when it cashes, add the option --restart=always the program to start depends on the image. I created a file /
Start a Docker Container on Boot
To start a container service in Ubuntu 14.04, just create an upstart config file in /etc/init. When you run the container, you should give it a name with option --name and you shoud add option --restart=always. E.g. for starting a docker container with a given name of «container-name», create a file /etc/init/container-name.conf that contains:
description "container name"
author "my name"
start on filesystem and started docker
stop on runlevel [!2345]
respawn
script
  /usr/bin/docker start -a container-name
end script
Run Your Own Registry
The simplest way to run your own registry is to run it in a docker instance, in this example, images should be stored in path /var/registry:
sudo mkdir /var/registry
sudo chown docker.docker /var/registry
sudo chmod g+w /var/registry
docker pull registry
docker run --name="docker_registry" --restart=always -e SETTINGS_FLAVOR=local -e STORAGE_PATH=/var/registry -e SEARCH_BACKEND=sqlalchemy -p 5000:5000 -v /var/registry:/var/registry registry
You can then access the repository on port 5000 of your host, e.g. localhost, so list all images:
wget -q -O- http://localhost:5000/v1/search; echo
Don’t forget to backup your Images in /var/registry.
Create Ubuntu and Apache Images from Scratch
Bootstrap an Ubuntu Utopic Unicorn
Go to a working directory, e.g. cd /tmp, then create a full installation of Ubuntu 14.10 Utopic Unicorn (which is the latest Ubuntu release at the time of writing) in subdirectory utopic:
mkdir utopic
sudo debootstrap utopic utopic
Create Docker Image from Directory
Now create a Docker image from the Ubuntu 14.10 Utopic Unicorn installation in subdirectory utopic, in my case, I’ll store the image on my own registry on host dev0004, port 5000 and give it the name library/ubuntu-utopic:
cd utopic
sudo tar c . | docker import - dev0004:5000/library/ubuntu-utopic
The image is now ready to be used locally, but not yet stored in my registry, so last step is to push it to my registry:
docker push dev0004:5000/library/ubuntu-utopic
Create New Image With Service Apache
Run a shell in a new container named apache-setup that runs the just created Ubuntu image:
docker run -it --name apache-setup dev0004:5000/library/ubuntu-utopic /bin/bash
Within this container, do all necessary configurations for a running Apache, in the easiest case, install apache2 and create a file /run.sh in the root, that starts Apache, then waits forever:
apt-get install apache2
cat > /run.sh <<EOF
#!/bin/bash
systemctl start apache2
sleep infinity
EOF
chmod +x /run.sh
exit
If you forgot a configuration step and need to go back to the stopped container, call:
docker start -i apache-setup
Create a new image from this container, again, it will be stored on my own registry on host dev0004, port 5000 and give it the name library/ubuntu-utopic-apache, then push the new image to the registry:
docker commit apache-setup dev0004:5000/library/ubuntu-utopic-apache
docker push dev0004:5000/library/ubuntu-utopic-apache
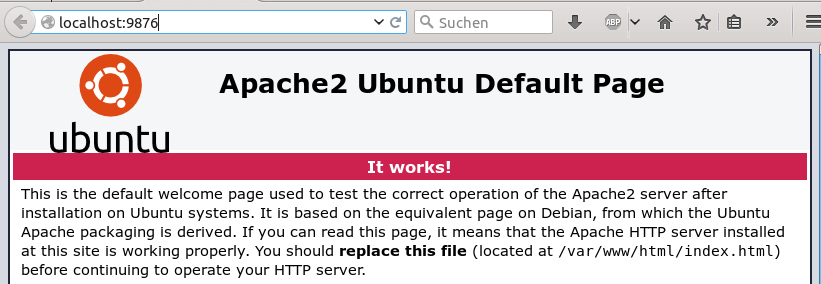
Now you can create a container from your Apache image. Just run the command /run.sh created above. Here I map port 80 (Apache) in the Docker container to port 9876 on the Host:
docker run -d --name test-apache -p 9876:80 dev0004:5000/library/ubuntu-utopic-apache /run.sh
If everything works, open your browser, head to http://localhost:9876 and you see the default apache page.
Working with Dockerfile
Create Apache Image using Dockerfile
Alternatively to the above, it is possible to derive a new image from an existing image plus applying a docker file. For Dockerfile syntax details try man dockerfile. This way, you can do even more configurations, i.e. you can specify the program to run as ENTRYPOINT and you don’t need the /run.sh-script any more.
To generate an Ubuntu Utopic Unicorn Apache image, change to an empty directory and create a file Dockerfile in it:
FROM dev0004:5000/library/ubuntu-utopic
MAINTAINER "Marc Wäckerlin"
RUN apt-get install -y apache2
EXPOSE 80 443
VOLUME ["/var/www", "/var/log/apache2", "/etc/apache2"]
ENTRYPOINT ["/usr/sbin/apache2ctl", "-D", "FOREGROUND"]
Now cd to that directory, that contains only the docker file and build the an image dev0004:5000/library/ubuntu-utopic-apache from the docker file and push it to your registry:
docker build --rm --force-rm --pull -t dev0004:5000/library/ubuntu-utopic-apache .
dev0004:5000/library/ubuntu-utopic-apache
Now, running it is simpler, because there is no need to specify a command, the ENTRYPOINT is enough as default:
docker run -d --name test-apache -p 9876:80 dev0004:5000/library/ubuntu-utopic-apache
ADD vs. COPY
COPY copies files from the host, i.e. from the Dockerfile directory into the docker container, it is a subset of ADD. ADD can also handle URLs as source and ADD untars tarred sources.
Completely Delete an Image on Private Registry
If you are experimenting, then sometimes it might be necessary to cleanup by completely removing images from your own repository. You can do this through a REST API call. Here an example, where I delete image library/ubuntu-unicorn from a registry that runs on port 5000 of host dev0004:
curl -X DELETE http://dev0004:5000/v1/repositories/library/ubuntu-unicorn/
Docker Volumes
If you specify a volume in a container, it means, that there are data that are not part of the container image. So if you commit a container, the volumes won’t be changed in the image. On the other hand, you can mount a local file or filesystem of the host to a volume inside a container. This way, you can easily backup your data or even remove or replace the container (e.g. by a newer version) and keep the data.
Link container file /var/www to host’s /home/me/data/www-test:
docker run [...] -v /home/me/data/www-test:/var/www [...]
Several container can share the same data in a data container. Link the volumes of one docker data container to the volumes of another docker container, where container1 contains only data and container2 and container3 contain the application that accesses the data:
docker create --name container1 -v /path/to/data [...]
docker run --name container2 --volumes-from container1 [...]
docker run --name container2 --volumes-from container1 [...]
Backup the data, e.g. attach a busybox container that tars the data:
docker run --volumes-from container1 -v $(pwd):/backup busybox tar xjf /backup/backup.tar.bz2 /path/to/data
Linking Docker Container
Linking two docker instances together using option docker run --link other-container-name:alias results in local environment variables named ALIAS_... in the docker instance, there you find connect information, such as URL or ports. Also, the hostname alias is added to /etc/hosts, so you can address the link partner using its host name.
Changing Bridge Subnetwork
In my company, they use the 172.16.0.0/16 and 172.17.0.0/16 range for internal purpose, so when I start docker on my laptop, it takes one out of those addresses, and when I then try to use our intranet, it fails. Therefore I need to specify a different range in /etc/default/docker:
DOCKER_OPTS="--bip=172.21.42.1/16"
Unfortunately, due to a bug in docker, it’s not enough to restart docker, but bridge and iptables need to be reset:
sudo systemctl stop docker
sudo iptables -t nat -F
sudo ifconfig docker0 down
sudo brctl delbr docker0
sudo systemctl start docker
That’s it, unless you use docker swarm. In that case, swarm creates docker_gwbridge on 172.17.0.1. To get rid of it and set it, e.g. to 172.28.0.1:
docker swarm leave
docker network rm docker_gwbridge
docker network create \
       --subnet 172.28.0.0/20 \
       --gateway 172.28.0.1 \
       -o com.docker.network.bridge.enable_icc=false \
       -o com.docker.network.bridge.name=docker_gwbridge \
       docker_gwbridge
Then init or join the swarm again.
Marc Wäckerlin – Cross Compile OpenSSL for Windows on Linux am 3. April 2017 um 13:59 Uhr
[…] support a maintained docker image that contains an Ubuntu based build environment and build scripts for several libraries and […]
Marc Wäckerlin – Docker Swarm and GlusterFS am 16. September 2017 um 07:34 Uhr
[…] Evaluation, I recommend using docker swarm instead of kubernetes. Docker swarm is now integrated in docker, so it fits perfectly the need when using docker, and moreover it is extremely simple to use and […]
Marc Wäckerlin – Access Encrypted ZFS from Rescue Boot am 3. März 2023 um 00:29 Uhr
[…] yourself to the group docker to be able to use docker without sudo. A normal person would read the best blog entry on docker to get the exact command. But not me, I thought it’s a good idea to write the command from my […]